
There is of course the whale project, which I'm planning on turning out a high quality final product of by the end of the month (knock on wood), but there has been a project I've been meaning to do pretty much since my first year here in NZ...
 That is of course the Mosasaur... I guess technically I'm aiming for a Tylosaur, but I typed up the rest of this post using Mosasaur and I'm too lazy to change them all. Besides technically a Tylosaurid is a variety of Mosasaur, so I win.
He has received updates throughout many stages of my 3Ding techniques. The Mosasaur started life as one of only two "Mark: 1" generation models (the other being my first version of Larry). Pictured here in the only rendering of it I still have.
 Of course as my modelling and, especially, shading techniques improved I'd try to keep the Mosasaur up to date.
 `
His initial Mark: 2 version was a little too Ichthyosaur in the skull...
 A quick update had him corrected quite a bit!
For quite some time I came back to the Mosasaur every few months to keep him update with what I was doing 3Dwise.

As I stalled on my Mark: 2 modelling technique, the improvements got harder and harder. (The top Mosasaur is the latest version the bottom one is its predecessor).
 This is where the poor guy has been sitting, never officially seeing the light of day. Yet being cutting edge when he was created, my Mosasaur is now dreadfully behind the modelling times...
I can't let this stand! I've decided he will become the prototype for my new Mark: 6 technique, which will involve a new means of creating 3D objects.
What am I aiming to improve exactly? Well I'd very much like to do a Mosasaur piece for ART Evolved, it needs to be scientifically accurate. So here are some of my current inspirations.

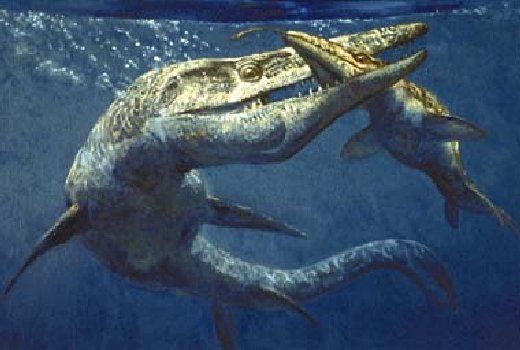
My latest palaeo-art obsession of late has been this Tylosaur by Julius Csotonyi. It completely captures the connection between Mosasaurs and their Monitor Lizard ancestors. Which is one of the things that intrigues me about Mosasaurs (I love monitor lizards, they are such elegant predators... except in their walking :p). Julius has accomplished this mostly through the colouration. Though a few slight hints on the skull anatomy help too.
I would very much love to capture this same feel...
 Fortunately I have some fantastic reference photos of the Australian Perentie monitor lizard (Varanus giganteus), which I think if slightly modified would make an excellent Mosasaur colour pattern.
I have a couple ART Evolved articles in the works off what I've been doing with my extant references...
 There are still other influences on what I'd like my Mosasaur to look like. Dan Varner is the man when it comes to restoring these marine killers back. So I'll be looking at his work from time to time.
`
 I've had a huge respect for the line drawings of Russell Hawley, and have found them a very good reference for the difference in skulls between various families of Mosasaurs. I've cut his Tylosaurus out from a selection of other Mosasaur types as this is what I am striving to emulate.
 In addition to my recent discovery and inspiration from Csotonyi, this Mosasaur by Luis V. Rey has become one of my key references. I especially love the lower jaw and all the teeth on this guy!
 Lastly is this old reference of mine, by I think, John Sibbick. If anyone knows one way or the other I'd appreciate it. Anyways I love his paddles.
I have one big question before launching into my effort. Monitor Lizards and Snakes, Mosasaurs closet living relatives, both have lips covering their teeth. Did Mosasaurs too?
This makes a huge difference to my restoration effort. So I'd like to know.
Anyways I'm going to conclude this huge online ramble. Just firing a few of my thoughts and feelings onto paper (after a fashion :P). I find it sometimes helps.
Start updating you once I've dived into this project.

 Despite the
  One of the last major ways I can innovate my 3Ding and expand my skill base, without a software shift, is in how I actually build my models. At moment I've restricted myself to Spline modelling, which you see pictured here.
 An easy solution to adding these details (as at moment I'm rather happy with Spline modelling for initial basic construction) is Vertex modelling. In this system an object becomes something like a mass of clay that can be manipulated (pushed and pulled) by a series of points generated on its surface. You see them here as dots connected by lines. Move any of these points and you effect the nature of those lines (which represent the objects surface) which allows you a great deal of control of details.
 I have produced one model with a slight degree of Vertex detailing as of last week. The new

 Which if any of the elements in either look good and/or bad to you?
 The first step was to come up with a basic colour pattern for the animal. In this old system it could be remarkably simply (the one major advantage over the new system), and it would look way more impressive after then next two steps!
 Next I would apply a tiling effect that would give me a scale like pattern across the colours scheme. If I skipped the previous noise step my tiles would be very
  The huge twist on my modern
 The "before" shot of the
  The "after" in the form of yesterday's prototype of the new system. The details may not be clear (as again blogger won't let anyone zoom in on things I upload... their original forms are more then big enough for it to be possible, I typically render at 2272 x 1704, but blogger just doesn't let you enlargen them for some stupid reason!), but you can also see even just my choice of colours for the colour scheme is getting more tempered in common sense/real world
 I've completed the whole head region.
 I have proxy finished the legs. However as there are a few strips from the body that do not quite match up, the last hour will be tweaking these small discrepancies.
 As of such I'm sector checking them, and with this layer system I should be able to just cut and paste the strips from the body directly onto the legs!
 To get me on my way I've finished the skull.
 With the completion of this, the first additional piece, you can now see the benefit of my new